
Introduction to Homemade English Muffins
Why Choose Homemade English Muffins?
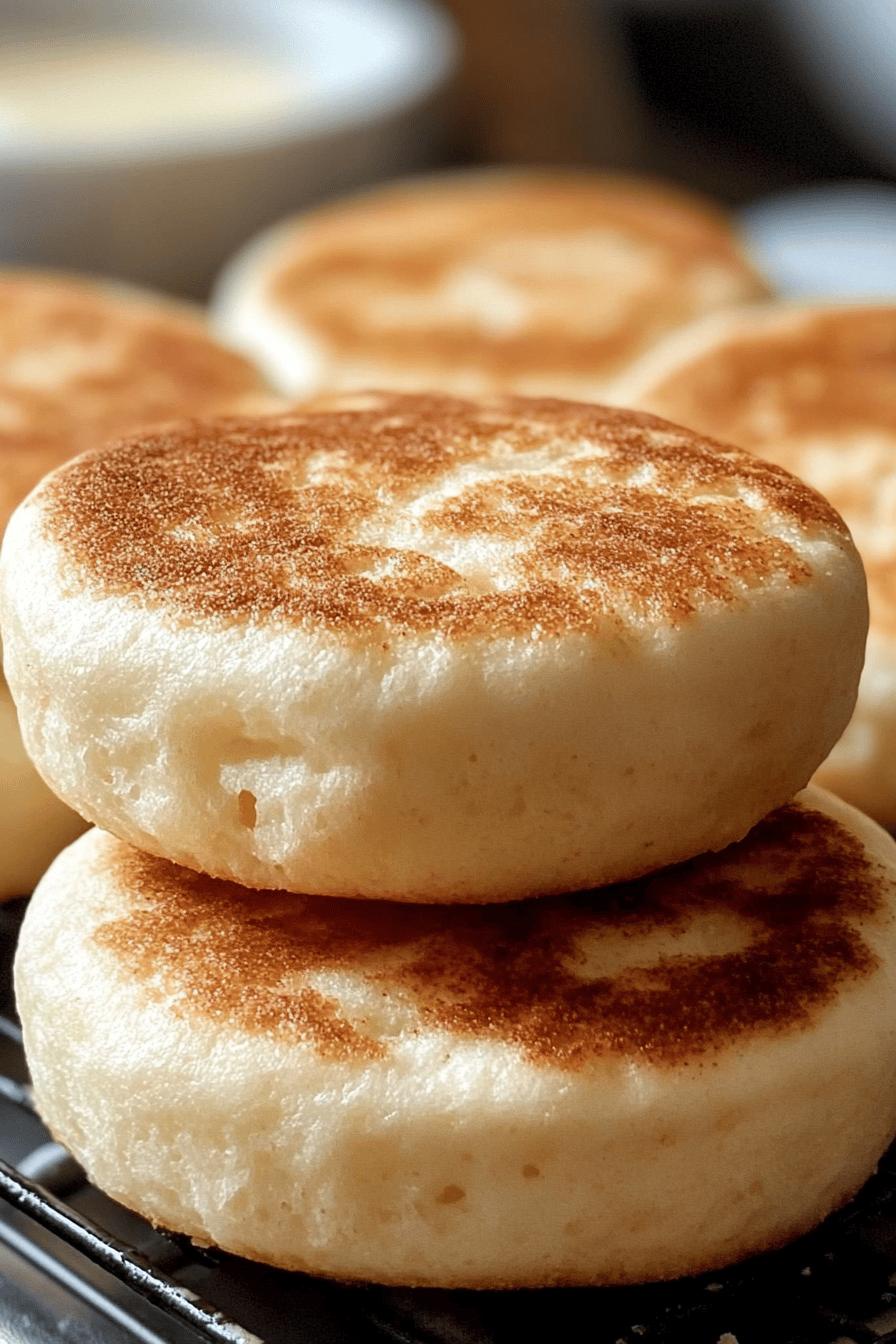
Homemade English muffins are a delightful addition to any breakfast table. They offer a fresh taste that store-bought versions simply can’t match. When you make them at home, you control the ingredients. This means you can avoid preservatives and artificial flavors. Plus, the aroma of baking muffins fills your kitchen with warmth and comfort. Imagine waking up to the smell of freshly baked muffins! It’s a great way to start your day.
The Joy of Baking Your Own Muffins
Baking your own English muffins is not just about the end product; it’s about the experience. Mixing, kneading, and shaping the dough can be a fun activity for the whole family. Children love to get involved, and it’s a wonderful way to teach them about cooking. As you watch the dough rise, you’ll feel a sense of accomplishment. And when you finally take those golden-brown muffins out of the oven, the joy is truly rewarding. Each bite is a reminder of the effort you put in, making them taste even better!
Ingredients for Homemade English Muffins
To create your own delicious homemade English muffins, you’ll need a few simple ingredients. Each one plays a vital role in achieving that soft, fluffy texture we all love. Here’s what you’ll need:
- 2 cups all-purpose flour: This is the base of your muffins, providing structure and texture.
- 1 cup warm milk: Warm milk helps activate the yeast, making your muffins rise beautifully.
- 2 tablespoons sugar: Sugar adds a touch of sweetness and helps with browning.
- 1 tablespoon active dry yeast: This is the magic ingredient that makes your muffins rise.
- 1 teaspoon salt: Salt enhances the flavor of your muffins.
- 2 tablespoons unsalted butter: Melted butter adds richness and flavor.
- Cornmeal: For dusting the baking surface, giving your muffins a nice texture.
These ingredients are easy to find and often already in your pantry. Using fresh ingredients will ensure the best results. So, gather your supplies and get ready to bake some delightful homemade English muffins!
Step-by-Step Preparation of Homemade English Muffins
Step 1: Mixing the Dough
Start by gathering all your ingredients. In a large mixing bowl, combine the warm milk and sugar. Stir gently until the sugar dissolves. Next, sprinkle the active dry yeast over the milk mixture. Let it sit for about 5-10 minutes until it becomes frothy. This means your yeast is active and ready to work its magic!
Once the yeast is frothy, add the melted butter and salt. Gradually mix in the all-purpose flour, one cup at a time. Use a wooden spoon or spatula to combine everything until a sticky dough forms. Don’t worry if it looks a bit messy; that’s perfectly normal!
Step 2: Kneading the Dough
Now it’s time to knead! Lightly flour a clean surface and turn the dough out onto it. Knead the dough for about 5-7 minutes. You want it to be smooth and elastic. If the dough sticks to your hands, sprinkle a little more flour as needed. Kneading is essential as it develops the gluten, giving your muffins that lovely texture.
Step 3: First Rise
After kneading, place the dough in a lightly greased bowl. Cover it with a clean kitchen towel or plastic wrap. Let it rise in a warm place for about 1 hour, or until it doubles in size. This is the first rise, and it’s crucial for fluffy muffins. You can preheat your oven to the lowest setting for a few minutes, then turn it off. This warm environment helps the dough rise faster!
Step 4: Shaping the Muffins
Once the dough has risen, punch it down gently to release the air. Turn it out onto a floured surface again. Divide the dough into equal pieces, about 8-10, depending on how large you want your muffins. Shape each piece into a round ball. Flatten them slightly to form discs. Dust both sides with cornmeal to prevent sticking and add a nice texture.
Step 5: Second Rise
Place the shaped muffins on a baking sheet lined with parchment paper. Cover them again with a towel and let them rise for another 30 minutes. This second rise is important for achieving that perfect fluffiness. While you wait, you can prepare your cooking surface!
Step 6: Cooking the Muffins
Heat a griddle or skillet over medium-low heat. Once hot, carefully place the muffins on the surface. Cook for about 5-7 minutes on each side. You want them to be golden brown and cooked through. Keep an eye on them to avoid burning. If they brown too quickly, lower the heat. Cooking them slowly ensures they are fluffy inside!
Step 7: Cooling and Storing
After cooking, transfer the muffins to a wire rack to cool completely. This helps them maintain their texture. Once cooled, you can store them in an airtight container. They can last for about a week at room temperature. For longer storage, freeze them! Just pop them in a freezer bag, and you’ll have homemade muffins ready whenever you want a tasty breakfast.
Variations of Homemade English Muffins
Whole Wheat Homemade English Muffins
If you’re looking for a healthier option, whole wheat homemade English muffins are a fantastic choice. By substituting all-purpose flour with whole wheat flour, you add more fiber and nutrients to your breakfast. The process remains the same, but you might need to adjust the liquid slightly. Whole wheat flour absorbs more moisture, so consider adding an extra tablespoon of warm milk. These muffins will have a nutty flavor and a denser texture, making them perfect for toasting and spreading with your favorite toppings.
Flavored Homemade English Muffins
Why not get creative with your homemade English muffins? You can easily add flavors to make them even more exciting! For instance, try adding fresh blueberries for a fruity twist. Simply fold in about a cup of washed and dried blueberries into the dough during the mixing stage. Alternatively, if you prefer savory muffins, consider adding shredded cheese, like cheddar or mozzarella. Just mix in about a cup of cheese before the first rise. These flavored muffins are perfect for breakfast sandwiches or as a snack throughout the day!
Cooking Note for Homemade English Muffins
Cooking homemade English muffins requires a bit of patience, but the results are well worth it! Here are some important tips to keep in mind while cooking:
- Temperature Control: Cooking at medium-low heat is key. This allows the muffins to cook evenly without burning. If your griddle or skillet is too hot, the outside may brown too quickly while the inside remains doughy.
- Use a Lid: If you have a lid for your skillet, consider covering the muffins while they cook. This helps trap heat and steam, ensuring they rise properly and cook through.
- Check for Doneness: To ensure your muffins are fully cooked, you can use a toothpick. Insert it into the center of a muffin; if it comes out clean, they’re ready! If not, give them a few more minutes.
- Batch Cooking: If you’re making a large batch, you can cook them in batches. Keep the cooked muffins warm in a low oven (around 200°F) while you finish cooking the rest.
- Experiment with Cooking Surfaces: While a griddle is traditional, you can also use a cast-iron skillet or even a non-stick frying pan. Each surface may give a slightly different texture, so feel free to experiment!
By following these cooking notes, you’ll ensure that your homemade English muffins turn out perfectly every time. Enjoy the process and the delicious results!
Serving Suggestions for Homemade English Muffins
Classic Toppings for Homemade English Muffins
Once your homemade English muffins are ready, it’s time to enjoy them! The beauty of these muffins lies in their versatility. You can keep it simple with classic toppings that enhance their flavor. Here are some popular choices:
- Butter: A pat of butter is a timeless choice. Spread it generously while the muffins are still warm. The butter melts beautifully, creating a rich and creamy texture.
- Jam or Jelly: For a sweet touch, add your favorite jam or jelly. Strawberry, raspberry, or even orange marmalade can brighten your morning.
- Honey: Drizzle some honey over your muffin for a natural sweetness. It pairs wonderfully with butter, too!
- Peanut Butter: For a protein-packed option, spread peanut butter on your muffin. It’s delicious and filling, perfect for a busy morning.
- Cream Cheese: A layer of cream cheese adds a rich and tangy flavor. You can even mix in herbs or spices for an extra kick!
These classic toppings are sure to please everyone at the breakfast table. Feel free to mix and match to find your favorite combination!
Creative Breakfast Sandwich Ideas
If you’re in the mood for something heartier, consider turning your homemade English muffins into delicious breakfast sandwiches. Here are some creative ideas to inspire you:
- Egg and Cheese: Fry or scramble an egg and place it on a toasted muffin with a slice of cheese. Add some avocado for a creamy texture!
- Bacon or Sausage: Layer crispy bacon or a sausage patty on your muffin. Top it with a fried egg for a classic breakfast sandwich.
- Veggie Delight: For a vegetarian option, add sautéed spinach, tomatoes, and feta cheese. This colorful sandwich is both healthy and tasty!
- Smoked Salmon: Spread cream cheese on your muffin and top it with smoked salmon and capers. This elegant option is perfect for brunch.
- Nut Butter and Banana: Spread almond or peanut butter on your muffin and top it with banana slices. This sweet and satisfying sandwich is great for kids!
These creative breakfast sandwich ideas will elevate your homemade English muffins to a whole new level. Enjoy experimenting with different flavors and ingredients!
Tips for Perfect Homemade English Muffins
Creating the perfect homemade English muffins is an art that can be mastered with a few helpful tips. Whether you’re a beginner or an experienced baker, these suggestions will ensure your muffins turn out fluffy and delicious every time.
- Use Fresh Ingredients: Always check the expiration dates on your yeast and flour. Fresh ingredients make a big difference in the rise and flavor of your muffins. If your yeast is old, it may not activate properly, leading to dense muffins.
- Measure Accurately: Baking is a science, so precise measurements are crucial. Use a kitchen scale for the best results, especially for flour. Too much flour can make your muffins dry.
- Temperature Matters: Ensure your milk is warm but not hot. If it’s too hot, it can kill the yeast. Aim for a temperature around 110°F (43°C). This warmth helps the yeast activate and rise effectively.
- Don’t Rush the Rises: Allowing the dough to rise fully is essential for achieving that light and airy texture. Be patient during both the first and second rises. If your kitchen is cool, consider placing the dough in a slightly warm oven to speed up the process.
- Experiment with Cooking Times: Every stove is different, so keep an eye on your muffins as they cook. Adjust the cooking time as needed to ensure they are golden brown on the outside and fluffy on the inside.
- Cool Completely: After cooking, let your muffins cool on a wire rack. This prevents them from becoming soggy and helps maintain their texture. If you store them while still warm, moisture can build up and affect their quality.
- Try Different Flours: While all-purpose flour is standard, experimenting with other flours can yield interesting results. Consider using bread flour for a chewier texture or a gluten-free blend if you have dietary restrictions.
By following these tips, you’ll be well on your way to baking perfect homemade English muffins that everyone will love. Enjoy the process and the delightful results!
Breakdown of Time for Homemade English Muffins
Prep Time
Preparing your homemade English muffins is a fun and engaging process. The prep time typically takes about 15-20 minutes. This includes gathering your ingredients, mixing the dough, and kneading it. Don’t rush this part! Taking your time ensures that everything is well combined and ready for the rising stages.
Cooking Time
Once your muffins have risen, the cooking time is relatively quick. You’ll need about 10-14 minutes to cook them on a griddle or skillet. Each side should take around 5-7 minutes. Keep an eye on them to achieve that perfect golden-brown color. Cooking them slowly at medium-low heat is key to ensuring they are fluffy inside.
Total Time
In total, you can expect to spend about 2 hours from start to finish when making homemade English muffins. This includes the time for both rises, which can take about 1.5 hours. The wait is worth it, as you’ll end up with delicious muffins that are perfect for breakfast or snacks. So, set aside some time, and enjoy the process of creating these delightful treats!
Nutritional Information for Homemade English Muffins
Calories in Homemade English Muffins
When it comes to enjoying homemade English muffins, knowing their calorie content can help you make informed choices. On average, one homemade English muffin contains about 120-150 calories. This can vary slightly based on the specific ingredients you use, such as the type of flour or added flavors. If you’re watching your calorie intake, these muffins can still fit into a balanced diet, especially when paired with healthy toppings.
Protein Content
Protein is an essential nutrient that helps keep you full and satisfied. Each homemade English muffin typically contains around 4-6 grams of protein. This amount can increase if you add protein-rich toppings like eggs or cheese. Including protein in your breakfast can help you maintain energy levels throughout the morning, making these muffins a great choice for a nutritious start to your day.
Sodium Levels
Monitoring sodium intake is important for overall health. A homemade English muffin generally contains about 200-300 milligrams of sodium. This can vary based on the amount of salt you add during preparation. If you’re looking to reduce sodium, consider using less salt or opting for low-sodium toppings. Enjoying these muffins in moderation can help you maintain a balanced diet while still indulging in a delicious breakfast treat!
FAQs about Homemade English Muffins
Can I freeze Homemade English Muffins?
Absolutely! Freezing homemade English muffins is a great way to enjoy them later. Once your muffins have cooled completely, place them in a freezer bag or an airtight container. They can be stored in the freezer for up to three months. When you’re ready to enjoy them, simply take out a muffin and let it thaw at room temperature. You can also toast them directly from the freezer for a warm, delicious treat!
How do I know when my muffins are done cooking?
Knowing when your muffins are done is key to achieving that perfect texture. You can check for doneness by using a toothpick. Insert it into the center of a muffin; if it comes out clean or with just a few crumbs, your muffins are ready! Additionally, they should be golden brown on the outside and feel firm to the touch. If they seem soft or doughy, give them a few more minutes on the heat.
What can I use instead of all-purpose flour?
If you want to try something different, there are several alternatives to all-purpose flour. Whole wheat flour is a popular choice, adding more fiber and nutrients. You can also use bread flour for a chewier texture. For gluten-free options, consider using a gluten-free flour blend. Just keep in mind that different flours may require adjustments in liquid or cooking time, so be prepared to experiment a bit!
How long do Homemade English Muffins last?
Homemade English muffins can last about a week when stored in an airtight container at room temperature. If you want to keep them longer, freezing is the best option. Just remember to wrap them well to prevent freezer burn. When stored properly, they can last up to three months in the freezer. This way, you can always have a delicious breakfast option ready to go!
Conclusion on Homemade English Muffins
Recap of the Benefits of Making Your Own Muffins
Making your own homemade English muffins is a rewarding experience that brings numerous benefits. First, you have complete control over the ingredients, allowing you to create a healthier option without preservatives or artificial flavors. The process of baking can be a delightful family activity, fostering creativity and teamwork in the kitchen. Plus, the aroma of fresh muffins wafting through your home is simply irresistible! Each muffin you create is a testament to your effort, resulting in a delicious treat that tastes far superior to store-bought versions. Not to mention, you can customize them to suit your taste, whether you prefer classic flavors or adventurous variations.
Encouragement to Try the Recipe
So, why not give this homemade English muffin recipe a try? With simple ingredients and easy steps, you’ll be amazed at how quickly you can whip up a batch of these delightful muffins. Whether you enjoy them with butter and jam or transform them into a hearty breakfast sandwich, the possibilities are endless. Plus, the satisfaction of biting into a warm, fluffy muffin that you made yourself is unmatched. Gather your ingredients, roll up your sleeves, and embark on this baking adventure. Your mornings will never be the same!