
Introduction to Homemade Chocolate-Covered Ice Cream Bars
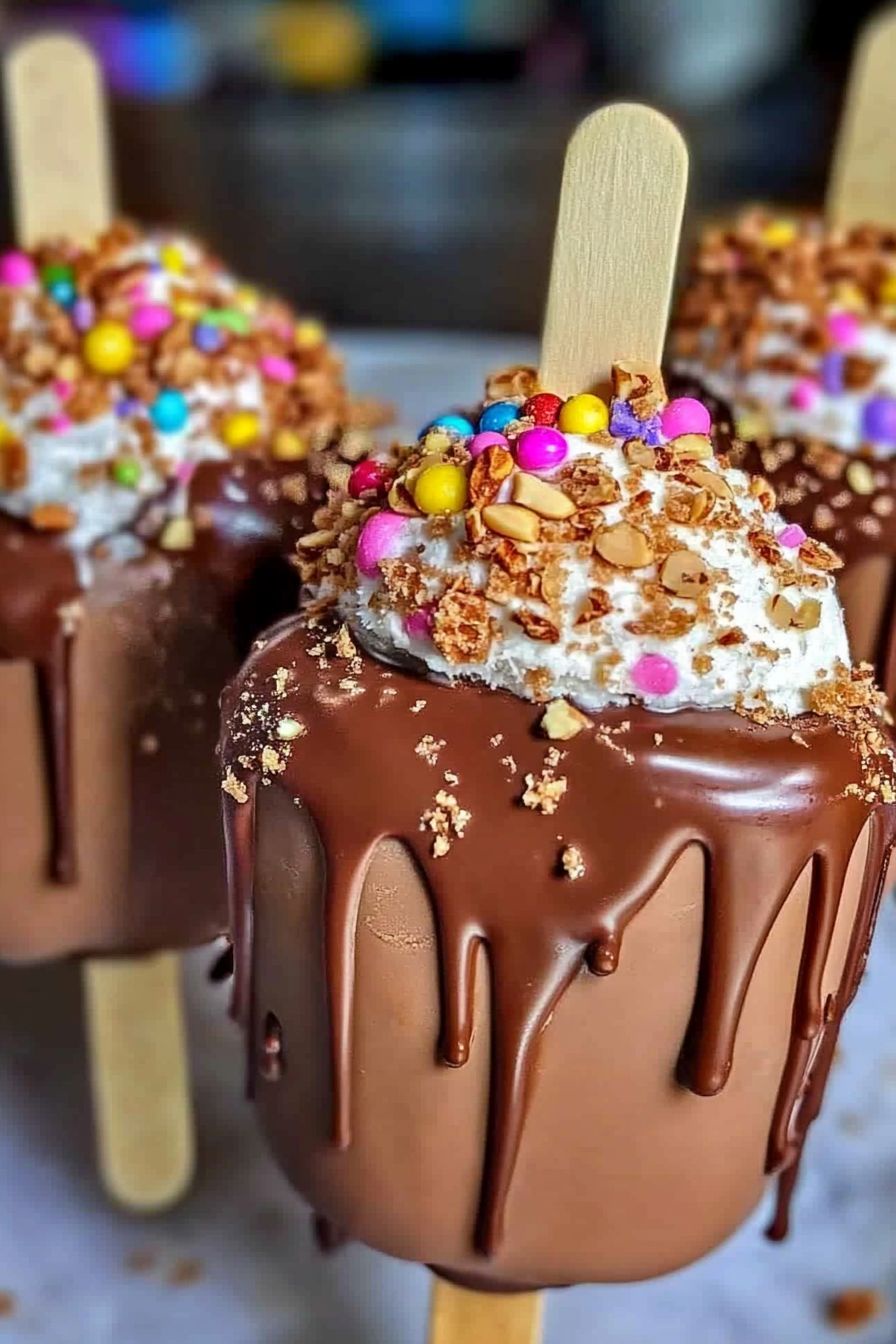
Are you ready to treat yourself to something special? Homemade chocolate-covered ice cream bars are the perfect way to enjoy a sweet, creamy delight. These bars are not just a dessert; they are a fun experience that you can create right in your kitchen. Imagine biting into a cold, creamy vanilla ice cream bar, only to be met with a rich layer of chocolate that melts in your mouth. Sounds delicious, right?
Why You Should Make Homemade Chocolate-Covered Ice Cream Bars
There are many reasons to whip up a batch of these delightful treats. First, they are incredibly easy to make. With just a few simple ingredients, you can create a dessert that rivals any store-bought option. Plus, making them at home allows you to customize flavors and toppings to suit your taste. Want to add some crunchy nuts or colorful sprinkles? Go for it!
Another great reason to make these bars is that they are perfect for any occasion. Whether it’s a hot summer day or a cozy movie night, these ice cream bars will surely bring smiles to everyone’s faces. They are also a fantastic way to involve kids in the kitchen. Let them help with dipping and decorating, making it a fun family activity.
Lastly, homemade chocolate-covered ice cream bars are a healthier alternative to many store-bought treats. You can control the ingredients, ensuring that you use high-quality chocolate and fresh ice cream. This way, you can indulge without the guilt!
So, gather your ingredients and get ready to create a delicious frozen treat that will impress your family and friends. Let’s dive into the ingredients you’ll need to make these delightful homemade chocolate-covered ice cream bars!
Ingredients for Homemade Chocolate-Covered Ice Cream Bars
To create your own homemade chocolate-covered ice cream bars, you’ll need a few simple ingredients. Each component plays a vital role in making these treats delicious and satisfying. Here’s what you’ll need:
- Vanilla Ice Cream: 4 cups of your favorite vanilla ice cream. You can use store-bought or homemade ice cream.
- Chocolate Chips: 2 cups of semi-sweet or dark chocolate chips. You can also use milk chocolate for a sweeter taste.
- Coconut Oil: 2 tablespoons of coconut oil. This helps the chocolate melt smoothly and gives it a nice shine.
- Toppings: Choose a variety of toppings to add some crunch and color. Here are some ideas:
- Chopped nuts (almonds, peanuts, or walnuts)
- Crushed cookies (Oreos or graham crackers)
- Colorful sprinkles
- Shredded coconut
- Mini chocolate chips
Feel free to mix and match these ingredients based on your preferences. The beauty of homemade chocolate-covered ice cream bars is that you can customize them to suit your taste. Now that you have your ingredients ready, let’s move on to the step-by-step preparation!
Step-by-Step Preparation of Homemade Chocolate-Covered Ice Cream Bars
Now that you have gathered all your ingredients, it’s time to get started on making your homemade chocolate-covered ice cream bars. Follow these simple steps to create a delicious treat that everyone will love!
Step 1: Prepare the Ice Cream Base
First, you need to prepare the ice cream base. If you’re using store-bought vanilla ice cream, let it sit at room temperature for about 10 minutes. This will make it easier to scoop. If you’re making homemade ice cream, ensure it’s fully churned and ready to go. Once softened, scoop the ice cream into a rectangular dish or a baking tray lined with parchment paper. Spread it evenly, about 1 to 2 inches thick. Smooth the top with a spatula for a nice finish.
Step 2: Freeze the Ice Cream
After preparing the ice cream base, it’s time to freeze it. Cover the dish with plastic wrap or a lid and place it in the freezer. Let it freeze for at least 4 hours, or until it’s firm. This step is crucial, as it ensures that your ice cream bars hold their shape when you dip them in chocolate.
Step 3: Melt the Chocolate
While the ice cream is freezing, you can melt the chocolate. In a microwave-safe bowl, combine the chocolate chips and coconut oil. Microwave in 30-second intervals, stirring in between, until the chocolate is completely melted and smooth. Be careful not to overheat it, as chocolate can burn easily. Once melted, set the bowl aside to cool slightly.
Step 4: Dip the Ice Cream Bars
Once the ice cream is firm, take it out of the freezer. Use a sharp knife to cut the ice cream into bars of your desired size. You can make them small or large, depending on your preference. Next, take each bar and dip it into the melted chocolate. Make sure to coat it evenly. Allow any excess chocolate to drip off before placing the bar on a baking sheet lined with parchment paper.
Step 5: Add Toppings
Now comes the fun part! While the chocolate is still wet, sprinkle your chosen toppings over the bars. You can use chopped nuts, crushed cookies, or colorful sprinkles. Get creative! Once all the bars are coated and topped, return them to the freezer for about 30 minutes. This will help the chocolate set and harden.
And there you have it! Your homemade chocolate-covered ice cream bars are ready to enjoy. They are perfect for sharing or keeping all to yourself. Let’s explore some variations to make these treats even more exciting!
Variations of Homemade Chocolate-Covered Ice Cream Bars
Now that you’ve mastered the basic recipe for homemade chocolate-covered ice cream bars, it’s time to get creative! There are endless possibilities when it comes to flavors and toppings. Let’s explore some fun variations that will take your ice cream bars to the next level.
Flavor Variations
While vanilla ice cream is a classic choice, you can easily switch things up with different flavors. Here are some ideas to inspire you:
- Chocolate Ice Cream: For chocolate lovers, use chocolate ice cream instead of vanilla. This will give you a double chocolate treat!
- Strawberry Ice Cream: A fruity twist! Strawberry ice cream adds a refreshing flavor that pairs beautifully with chocolate.
- Mint Chocolate Chip: If you enjoy mint, try mint chocolate chip ice cream. The cool mint flavor is delightful with the rich chocolate coating.
- Cookie Dough: For a fun surprise, use cookie dough ice cream. The chunks of cookie dough will add a chewy texture to your bars.
- Peanut Butter: Peanut butter ice cream offers a creamy, nutty flavor that complements the chocolate perfectly.
Feel free to mix and match flavors to create your own unique combinations. The possibilities are endless, and you can tailor them to your taste preferences!
Topping Variations
Now that you have some flavor ideas, let’s talk about toppings! Toppings can add crunch, color, and extra flavor to your ice cream bars. Here are some tasty options:
- Chopped Nuts: Almonds, peanuts, or pecans add a delightful crunch. Toast them lightly for an extra flavor boost.
- Crushed Candy Bars: Chop up your favorite candy bars, like Snickers or Reese’s, and sprinkle them on top for a sweet surprise.
- Granola: For a healthier option, use granola. It adds a nice crunch and can be a great way to sneak in some oats.
- Fruit: Fresh fruit like sliced strawberries or bananas can add a refreshing touch. Just make sure to use them right after dipping to avoid sogginess.
- Drizzles: Drizzle some caramel or extra melted chocolate over the top for an elegant finish.
Mix and match these toppings to create your perfect homemade chocolate-covered ice cream bars. The fun part is experimenting with different combinations to find your favorites!
Cooking Note for Homemade Chocolate-Covered Ice Cream Bars
When making homemade chocolate-covered ice cream bars, a few cooking notes can help ensure your treats turn out perfectly. First, always use high-quality chocolate for melting. This will enhance the flavor and texture of your bars. If you prefer a smoother finish, consider using chocolate specifically designed for melting, such as candy melts or couverture chocolate.
Additionally, the temperature of your ice cream is crucial. If the ice cream is too soft, it may melt too quickly when dipped in chocolate. On the other hand, if it’s too hard, it can be challenging to cut into bars. Aim for a balance where the ice cream is firm but not rock solid. Letting it sit for a few minutes at room temperature before cutting can help achieve this.
When melting chocolate, be patient. Stirring frequently while microwaving helps prevent burning. If you notice the chocolate starting to seize or clump, add a teaspoon of coconut oil or vegetable oil to smooth it out. This will also help the chocolate adhere better to the ice cream.
Lastly, don’t rush the freezing process after dipping. Allowing the bars to freeze for at least 30 minutes ensures the chocolate coating hardens properly. This step is essential for achieving that satisfying crunch when you take a bite. With these cooking notes in mind, you’ll be well on your way to creating delicious homemade chocolate-covered ice cream bars that everyone will love!
Serving Suggestions for Homemade Chocolate-Covered Ice Cream Bars
Now that your homemade chocolate-covered ice cream bars are ready, it’s time to think about how to serve them! These delightful treats can be enjoyed in various ways, making them perfect for any occasion. Here are some serving suggestions to elevate your dessert experience:
- On a Stick: Serve the ice cream bars on wooden sticks for a classic look. This makes them easy to hold and eat, especially for kids!
- With Dipping Sauces: Offer a selection of dipping sauces on the side. Warm chocolate sauce, caramel, or even fruit sauces can add an extra layer of flavor.
- Ice Cream Sundae Style: Crumble the bars over a bowl of vanilla or chocolate ice cream. Top with whipped cream, nuts, and a cherry for a fun sundae twist!
- As a Party Platter: Arrange the bars on a colorful platter with a variety of toppings and sauces. This makes for a beautiful dessert table at parties or gatherings.
- With Fresh Fruit: Serve the bars alongside fresh fruit like strawberries, raspberries, or banana slices. The fruity flavors complement the rich chocolate perfectly.
These serving suggestions not only enhance the presentation but also allow your guests to customize their treats. Whether you’re hosting a summer barbecue, a birthday party, or just enjoying a quiet evening at home, these homemade chocolate-covered ice cream bars will surely impress everyone. So, grab your bars, get creative, and enjoy every delicious bite!
Tips for Perfect Homemade Chocolate-Covered Ice Cream Bars
Creating the perfect homemade chocolate-covered ice cream bars is all about the details. With a few helpful tips, you can ensure that your treats turn out delicious every time. Here are some essential tips to keep in mind:
- Choose the Right Ice Cream: For the best results, use high-quality ice cream. Look for brands that use real ingredients and have a creamy texture. This will enhance the overall flavor of your bars.
- Let Ice Cream Soften: Before scooping, let your ice cream sit at room temperature for about 10 minutes. This makes it easier to spread and cut into bars without melting too quickly.
- Use a Sharp Knife: When cutting the frozen ice cream, use a sharp knife dipped in warm water. This helps create clean cuts and prevents the ice cream from cracking.
- Work Quickly with Chocolate: When dipping the bars in chocolate, work quickly to avoid melting the ice cream. If the chocolate starts to harden, gently reheat it in the microwave for a few seconds.
- Chill Between Steps: If you find that the ice cream is getting too soft while you’re dipping, pop the bars back in the freezer for a few minutes. This will help maintain their shape and texture.
- Experiment with Flavors: Don’t be afraid to try different ice cream flavors and toppings. Mixing flavors can lead to exciting combinations that surprise your taste buds!
- Store Properly: To keep your chocolate-covered ice cream bars fresh, store them in an airtight container in the freezer. This prevents freezer burn and keeps them tasting great.
- Enjoy Freshly Made: While these bars can be stored, they are best enjoyed fresh. The chocolate coating is crispest right after they’ve been dipped and frozen.
By following these tips, you’ll be well on your way to making perfect homemade chocolate-covered ice cream bars that everyone will love. So, gather your ingredients, get creative, and enjoy the sweet rewards of your hard work!
Breakdown of Time for Homemade Chocolate-Covered Ice Cream Bars
When making homemade chocolate-covered ice cream bars, it’s essential to plan your time wisely. Understanding the time needed for each step can help you manage your kitchen efficiently. Here’s a breakdown of the time involved in creating these delightful treats:
Prep Time
The prep time for these homemade chocolate-covered ice cream bars is relatively short. You’ll spend about 15 to 20 minutes gathering your ingredients and preparing the ice cream base. This includes softening the ice cream, spreading it in a dish, and getting your chocolate ready for melting. If you’re using store-bought ice cream, the prep time will be on the shorter side. However, if you’re making homemade ice cream, factor in additional time for churning.
Cooking Time
The cooking time mainly involves melting the chocolate and freezing the ice cream. Melting the chocolate takes about 5 to 10 minutes, depending on your microwave’s power. The most significant time commitment is freezing the ice cream. You’ll need to freeze it for at least 4 hours, or until it’s firm enough to cut into bars. This step is crucial for achieving the perfect texture.
Total Time
In total, you can expect to spend around 4 hours and 30 minutes to make these homemade chocolate-covered ice cream bars. This includes the prep time, cooking time, and the necessary freezing time. While it may seem like a long process, most of this time is hands-off, allowing you to relax or prepare other dishes while your ice cream bars freeze. Once they’re ready, you’ll have a delicious treat that’s well worth the wait!
Nutritional Information for Homemade Chocolate-Covered Ice Cream Bars
Understanding the nutritional content of your homemade chocolate-covered ice cream bars can help you enjoy them guilt-free. While these treats are delicious, it’s essential to be aware of what you’re consuming. Here’s a breakdown of the nutritional information for one chocolate-covered ice cream bar, based on the ingredients listed above:
Calories
Each homemade chocolate-covered ice cream bar contains approximately 250 to 300 calories. This number can vary based on the specific ingredients you use, such as the type of ice cream and the amount of chocolate and toppings. If you choose lighter options, like low-fat ice cream or fewer toppings, you can reduce the calorie count.
Protein
In terms of protein, each bar provides about 4 to 6 grams. The protein content mainly comes from the ice cream, especially if you opt for a brand that includes milk or cream. If you want to boost the protein content, consider using ice cream made with added protein or incorporating protein-rich toppings like nuts.
Sodium
Regarding sodium, each bar typically contains around 100 to 150 milligrams. This amount can vary depending on the toppings you choose. For instance, salted nuts will increase the sodium content, while fresh fruit will keep it lower. If you’re watching your sodium intake, be mindful of the toppings you select.
By keeping these nutritional facts in mind, you can enjoy your homemade chocolate-covered ice cream bars while being aware of their impact on your diet. Remember, moderation is key, and these treats can be a delightful part of a balanced diet!
FAQs about Homemade Chocolate-Covered Ice Cream Bars
Can I use different types of chocolate for the coating?
Absolutely! You can use various types of chocolate for coating your homemade chocolate-covered ice cream bars. Semi-sweet, dark, and milk chocolate are all great options. If you prefer a sweeter taste, milk chocolate is perfect. For a richer flavor, dark chocolate is the way to go. You can even experiment with white chocolate for a unique twist. Just remember to adjust the melting process slightly, as different chocolates may have varying melting points.
How long can I store homemade chocolate-covered ice cream bars?
You can store your homemade chocolate-covered ice cream bars in the freezer for up to two weeks. To keep them fresh, place them in an airtight container or wrap them individually in plastic wrap. This will help prevent freezer burn and keep the chocolate coating crisp. However, for the best taste and texture, it’s recommended to enjoy them within the first week after making them.
Can I make these ice cream bars dairy-free?
Yes, you can easily make dairy-free chocolate-covered ice cream bars! Simply choose a dairy-free ice cream made from almond milk, coconut milk, or cashew milk. For the chocolate coating, look for dairy-free chocolate chips or dark chocolate that does not contain milk. This way, you can enjoy a delicious treat that fits your dietary needs without sacrificing flavor!
What are some creative topping ideas for homemade chocolate-covered ice cream bars?
There are countless creative topping ideas to make your homemade chocolate-covered ice cream bars even more exciting! Here are a few fun suggestions:
- Crushed Pretzels: Add a salty crunch with crushed pretzels for a sweet and salty combination.
- Toasted Coconut: Sprinkle toasted coconut flakes for a tropical twist.
- Mini Marshmallows: Add mini marshmallows for a fun, fluffy texture.
- Chili Powder: For a spicy kick, sprinkle a little chili powder on top of the chocolate before it sets.
- Edible Glitter: Make your bars sparkle with edible glitter for a festive touch!
Feel free to mix and match these toppings to create your own signature bars. The possibilities are endless, and the fun is in the creativity!
Conclusion on Homemade Chocolate-Covered Ice Cream Bars
In conclusion, homemade chocolate-covered ice cream bars are a delightful treat that brings joy to any occasion. They are not only easy to make but also allow for endless customization. Whether you prefer classic vanilla or adventurous flavors like mint chocolate chip, the choice is yours! The process of creating these bars can be a fun family activity, making it a perfect way to bond with loved ones.
As you experiment with different toppings and flavors, you’ll discover new combinations that excite your taste buds. From crunchy nuts to colorful sprinkles, the possibilities are truly limitless. Plus, knowing that you control the ingredients means you can indulge without the guilt often associated with store-bought treats.
So, the next time you’re looking for a refreshing snack or a sweet dessert, remember these homemade chocolate-covered ice cream bars. They are sure to impress your family and friends, and you might even find yourself making them again and again. Enjoy the process, savor each bite, and most importantly, have fun creating your own delicious frozen masterpieces!