
Introduction to Cannoli Cookies – A Fun Twist on the Classic Italian Dessert!
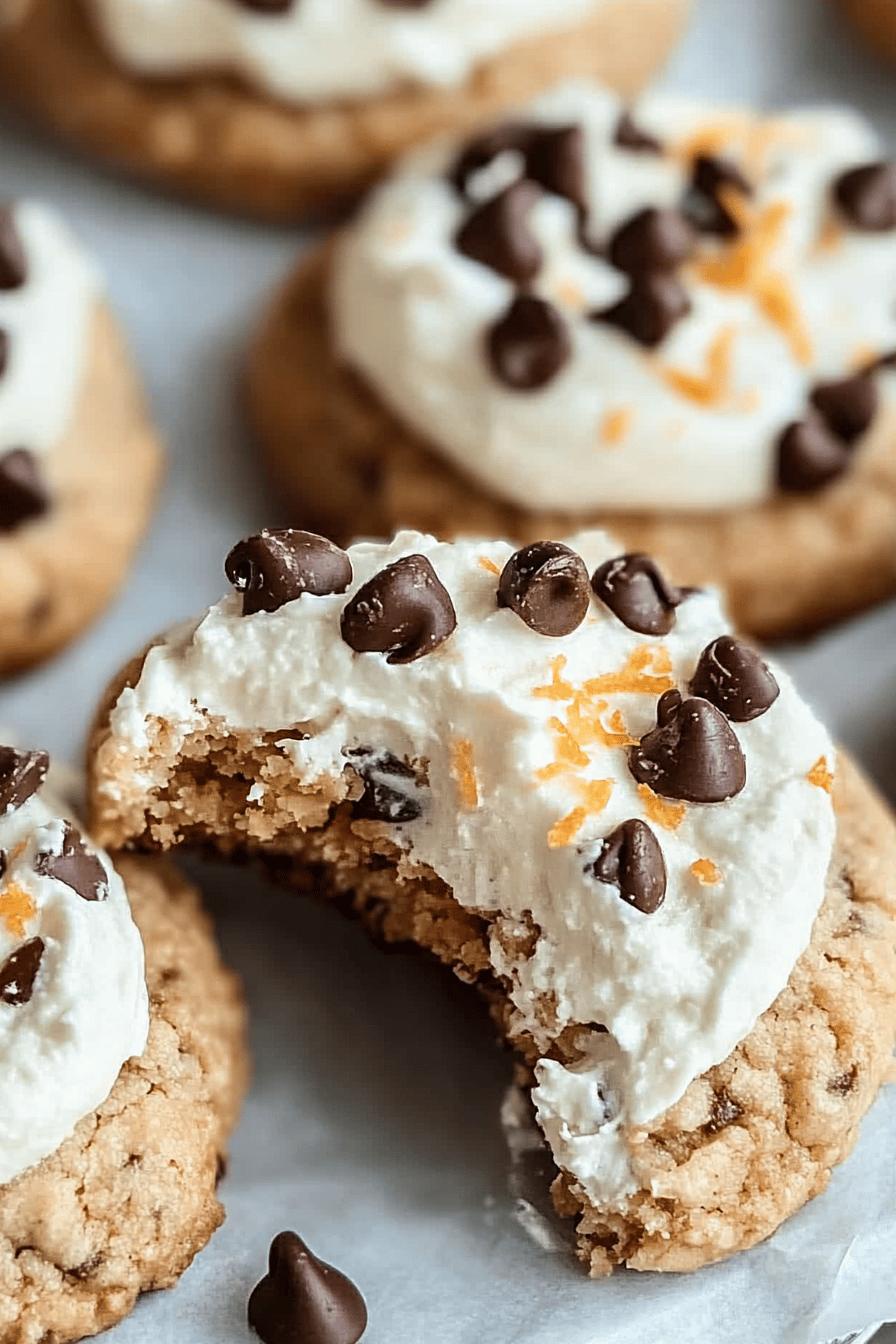
Cannoli Cookies are a delightful way to enjoy the classic Italian dessert in a new form. These cookies capture the essence of traditional cannoli, offering a crispy exterior and a creamy filling. They are perfect for anyone who loves the rich flavors of cannoli but prefers a simpler, more convenient treat. Whether you’re hosting a party or just want a sweet snack, these cookies are sure to impress!
The Origin of Cannoli and Its Evolution
The history of cannoli dates back to Sicily, where they were first made by the Arab rule in the 9th century. Originally, these pastries were created to celebrate the Carnevale season. Over time, cannoli evolved into a beloved dessert enjoyed year-round. Traditionally, they consist of a fried pastry shell filled with sweetened ricotta cheese, often enhanced with chocolate chips or candied fruit.
As culinary trends changed, so did the way people enjoyed cannoli. Bakers began experimenting with different forms, leading to the creation of cannoli-inspired treats like cakes, cupcakes, and, of course, cookies! Cannoli Cookies bring the same delicious flavors to a new format, making them easier to share and enjoy. They are a fun twist on a classic that everyone can appreciate.
In this article, we will guide you through the ingredients, preparation, and variations of Cannoli Cookies. You’ll learn how to make these delightful treats that are sure to become a favorite in your home. So, let’s dive into the world of Cannoli Cookies and discover how to create this fun and flavorful dessert!
Ingredients for Cannoli Cookies – A Fun Twist on the Classic Italian Dessert!
To create these delightful Cannoli Cookies, you’ll need a mix of simple ingredients that come together to form a delicious treat. Here’s what you’ll need:
- For the Cookie Dough:
- 2 cups all-purpose flour
- 1/2 cup unsalted butter, softened
- 1/2 cup granulated sugar
- 1 large egg
- 1 teaspoon vanilla extract
- 1/2 teaspoon baking powder
- 1/4 teaspoon salt
- For the Ricotta Filling:
- 1 cup ricotta cheese
- 1/2 cup powdered sugar
- 1 teaspoon vanilla extract
- 1/4 cup mini chocolate chips (optional)
- 1/4 cup chopped pistachios or candied fruit (optional)
- For Garnishing:
- Powdered sugar for dusting
- Chocolate chips or chopped nuts for decoration (optional)
These ingredients are easy to find and will help you create cookies that are both tasty and visually appealing. The combination of the crispy cookie and the creamy filling makes for a delightful treat that everyone will love. Now that you have your ingredients ready, let’s move on to the preparation of these scrumptious Cannoli Cookies!
Preparation of Cannoli Cookies – A Fun Twist on the Classic Italian Dessert!
Now that you have gathered all your ingredients, it’s time to prepare your Cannoli Cookies! This process is simple and fun, making it a great activity for the whole family. Follow these steps to create your delicious cookies.
Step 1: Preparing the Cookie Dough
Start by preheating your oven to 350°F (175°C). In a large mixing bowl, cream together the softened butter and granulated sugar until the mixture is light and fluffy. This usually takes about 2-3 minutes. Next, add the egg and vanilla extract, mixing well until everything is combined.
In a separate bowl, whisk together the all-purpose flour, baking powder, and salt. Gradually add this dry mixture to the wet ingredients, stirring until a soft dough forms. Be careful not to overmix, as this can make the cookies tough. Once your dough is ready, cover it with plastic wrap and let it chill in the refrigerator for about 30 minutes. Chilling helps the cookies hold their shape while baking.
Step 2: Shaping the Cookies
After chilling, take the dough out of the fridge. On a lightly floured surface, roll out the dough to about 1/4 inch thick. Use a round cookie cutter or a glass to cut out circles. You can make them as big or small as you like, but a 2-3 inch diameter works well. Place the cut-out circles on a baking sheet lined with parchment paper, leaving some space between each cookie.
Step 3: Baking the Cookies
Once your cookies are shaped, it’s time to bake! Place the baking sheet in the preheated oven and bake for 10-12 minutes, or until the edges are lightly golden. Keep an eye on them, as baking times can vary. Once done, remove the cookies from the oven and let them cool on the baking sheet for a few minutes before transferring them to a wire rack to cool completely.
Step 4: Making the Ricotta Filling
While the cookies are cooling, you can prepare the ricotta filling. In a medium bowl, combine the ricotta cheese, powdered sugar, and vanilla extract. Mix until smooth and creamy. If you want to add a little extra flavor, fold in mini chocolate chips or chopped pistachios. This filling is what makes your Cannoli Cookies truly special!
Step 5: Assembling the Cannoli Cookies
Once the cookies are completely cool, it’s time to assemble your Cannoli Cookies. Take one cookie and spread a generous amount of the ricotta filling on the flat side. Top it with another cookie, flat side down, to create a sandwich. Repeat this process until all cookies are filled. For a finishing touch, dust the assembled cookies with powdered sugar and add chocolate chips or chopped nuts on top if desired. Your Cannoli Cookies are now ready to be enjoyed!
Variation of Cannoli Cookies – A Fun Twist on the Classic Italian Dessert!
One of the best things about Cannoli Cookies is their versatility. You can easily customize them to suit your taste or dietary needs. Here are some fun flavor variations and dietary modifications to try!
Flavor Variations to Try
Why stick to the classic when you can explore new flavors? Here are some exciting ideas:
- Chocolate Cannoli Cookies: Add cocoa powder to the cookie dough for a rich chocolate flavor. You can also mix in chocolate chips into the ricotta filling for an extra chocolatey treat.
- Citrus Zest: Incorporate lemon or orange zest into the ricotta filling. This adds a refreshing twist that brightens the flavors.
- Nutty Delight: Mix in finely chopped nuts like almonds or hazelnuts into the cookie dough or the filling. This adds a delightful crunch and enhances the overall taste.
- Spiced Cookies: Add a pinch of cinnamon or nutmeg to the cookie dough for a warm, spiced flavor. This is especially nice during the fall and winter months.
- Fruit-Infused Filling: Fold in diced fruits like strawberries or raspberries into the ricotta filling. This adds a fruity burst that pairs beautifully with the creamy texture.
Feel free to mix and match these ideas to create your own unique Cannoli Cookies!
Dietary Modifications for Cannoli Cookies
If you have specific dietary needs, you can still enjoy Cannoli Cookies. Here are some modifications to consider:
- Gluten-Free: Substitute all-purpose flour with a gluten-free flour blend. Make sure to check that all other ingredients are gluten-free as well.
- Dairy-Free: Use a dairy-free ricotta alternative made from nuts or tofu. You can also replace butter with coconut oil or a dairy-free margarine.
- Vegan: To make these cookies vegan, use a flax egg (1 tablespoon ground flaxseed mixed with 2.5 tablespoons water) instead of the egg. Ensure that all other ingredients are plant-based.
- Reduced Sugar: You can cut down on sugar by using a sugar substitute or reducing the amount of powdered sugar in the filling. Just be mindful of the sweetness level!
With these variations and modifications, you can create Cannoli Cookies that fit your taste and dietary preferences. Enjoy experimenting and finding your perfect version of this delightful treat!
Cooking Note for Cannoli Cookies – A Fun Twist on the Classic Italian Dessert!
When making Cannoli Cookies, a few cooking notes can help ensure your treats turn out perfectly every time. These tips will guide you through the process, making it easier and more enjoyable.
First, always measure your ingredients accurately. Baking is a science, and even a small change in the amount of flour or sugar can affect the final product. Use measuring cups and spoons for precision.
Next, be mindful of the temperature of your ingredients. For the best results, your butter should be softened but not melted. This helps create a light and fluffy cookie dough. Similarly, using room temperature eggs will help the ingredients blend more easily.
When rolling out the dough, make sure your surface is lightly floured. This prevents sticking and allows for easier shaping. If the dough feels too sticky, you can sprinkle a little more flour on it. However, avoid adding too much flour, as it can make the cookies tough.
While baking, keep an eye on your cookies. Ovens can vary in temperature, so check for doneness a minute or two before the suggested baking time. The cookies should be lightly golden around the edges but still soft in the center.
Lastly, let the cookies cool completely before adding the ricotta filling. This step is crucial, as warm cookies can cause the filling to melt and ooze out. Once cooled, your cookies will hold their shape and provide a delightful contrast between the crispy exterior and creamy filling.
By following these cooking notes, you’ll be well on your way to creating delicious Cannoli Cookies that everyone will love. Happy baking!
Serving Suggestions for Cannoli Cookies – A Fun Twist on the Classic Italian Dessert!
Once your Cannoli Cookies are ready, it’s time to think about how to serve them! These delightful treats can be enjoyed in various ways, making them perfect for any occasion. Here are some serving suggestions to elevate your Cannoli Cookies experience:
- As a Dessert Platter: Arrange your Cannoli Cookies on a beautiful platter. You can add fresh fruits like strawberries or blueberries for a pop of color. This makes for an eye-catching dessert table centerpiece at parties or gatherings.
- With Coffee or Tea: Pair your cookies with a warm cup of coffee or tea. The creamy filling complements the rich flavors of your beverage, creating a delightful afternoon treat. Consider serving them with a sprinkle of cinnamon on top of your drink for an extra touch.
- At Celebrations: These cookies are perfect for celebrations like birthdays, holidays, or family gatherings. You can even decorate them with festive sprinkles or edible glitter to match the theme of your event.
- As Party Favors: Package individual Cannoli Cookies in clear bags tied with a ribbon. This makes a charming party favor for guests to take home. It’s a sweet reminder of the fun they had at your event!
- With Ice Cream: For a decadent dessert, serve your Cannoli Cookies alongside a scoop of vanilla or chocolate ice cream. The combination of the warm cookie and cold ice cream creates a delightful contrast that everyone will love.
These serving suggestions will help you showcase your Cannoli Cookies in a way that’s sure to impress. Whether you’re enjoying them at home or sharing them with friends, these cookies are a delightful treat that brings joy to any occasion!
Tips for Perfect Cannoli Cookies – A Fun Twist on the Classic Italian Dessert!
Creating the perfect Cannoli Cookies is all about attention to detail. With a few helpful tips, you can ensure that your cookies turn out delicious every time. Here are some essential tips to keep in mind:
- Chill the Dough: After mixing your cookie dough, always chill it for at least 30 minutes. This step helps the cookies maintain their shape while baking and prevents them from spreading too much.
- Use Quality Ingredients: The flavor of your Cannoli Cookies greatly depends on the quality of your ingredients. Opt for fresh ricotta cheese and pure vanilla extract for the best taste.
- Don’t Overbake: Keep a close eye on your cookies as they bake. They should be lightly golden around the edges but still soft in the center. Overbaking can lead to dry cookies.
- Experiment with Fillings: While the classic ricotta filling is delicious, don’t hesitate to try different flavors. Adding spices, citrus zest, or even flavored extracts can elevate your cookies.
- Let Cookies Cool Completely: Before adding the filling, ensure your cookies are completely cool. This prevents the filling from melting and ensures a perfect texture.
- Presentation Matters: For a beautiful presentation, dust your finished Cannoli Cookies with powdered sugar just before serving. You can also add a drizzle of chocolate or a sprinkle of nuts for extra flair.
- Store Properly: To keep your Cannoli Cookies fresh, store them in an airtight container. If you have leftover filling, keep it separate and fill the cookies just before serving to maintain their crispness.
By following these tips, you’ll be well on your way to making Cannoli Cookies that are not only tasty but also visually appealing. Enjoy the process and have fun experimenting with flavors and presentations!
Breakdown of Time for Cannoli Cookies – A Fun Twist on the Classic Italian Dessert!
Understanding the time needed to make Cannoli Cookies can help you plan your baking session better. Here’s a simple breakdown of the time involved in preparing these delightful treats.
Prep Time
The prep time for Cannoli Cookies is approximately 30 minutes. This includes gathering your ingredients, preparing the cookie dough, and chilling it in the refrigerator. Chilling is essential as it helps the dough firm up, making it easier to shape the cookies later.
Cooking Time
Once your dough is ready, the cooking time is about 10-12 minutes. This is the time it takes to bake the cookies until they are lightly golden. Keep an eye on them to ensure they don’t overbake, as this can lead to a dry texture.
Total Time
In total, you can expect to spend around 1 hour on making Cannoli Cookies. This includes both prep and cooking time. If you factor in the cooling time for the cookies and the filling preparation, you might want to set aside a little extra time. However, the delicious results are well worth the wait!
With this time breakdown, you can easily fit Cannoli Cookies into your baking schedule. Whether you’re making them for a special occasion or just for fun, knowing how long it takes will help you enjoy the process even more!
Nutritional Information for Cannoli Cookies – A Fun Twist on the Classic Italian Dessert!
Understanding the nutritional information of Cannoli Cookies can help you enjoy them while keeping track of your dietary needs. Here’s a breakdown of the key nutritional components for one Cannoli Cookie, based on the recipe provided. Keep in mind that these values may vary slightly depending on the specific ingredients used and portion sizes.
Calories
Each Cannoli Cookie contains approximately 150 calories. This makes them a delightful treat that can fit into a balanced diet. While they are sweet and satisfying, moderation is key. Enjoying one or two cookies can satisfy your sweet tooth without overindulging.
Protein
These cookies provide about 3 grams of protein per cookie. The ricotta filling contributes to this protein content, making Cannoli Cookies a more filling option compared to many other desserts. Protein is essential for muscle repair and growth, so these cookies can be a tasty way to add a little extra protein to your day.
Sodium
Each Cannoli Cookie contains roughly 80 milligrams of sodium. This is a relatively low amount, making them a suitable choice for those watching their sodium intake. However, if you are on a strict low-sodium diet, consider using unsalted butter and checking the sodium content of your ricotta cheese to keep it in check.
By keeping these nutritional facts in mind, you can enjoy your Cannoli Cookies guilt-free. They are a delicious way to indulge in a classic Italian dessert while still being mindful of your health. So go ahead, treat yourself to these delightful cookies!
FAQs about Cannoli Cookies – A Fun Twist on the Classic Italian Dessert!
Can I make Cannoli Cookies ahead of time?
Absolutely! You can prepare the cookie dough and chill it in the refrigerator for up to 24 hours before baking. This makes it easy to have fresh cookies ready for any occasion. You can also bake the cookies ahead of time and store them without the filling. Just wait to assemble them until you’re ready to serve for the best texture and flavor.
How do I store Cannoli Cookies?
To keep your Cannoli Cookies fresh, store them in an airtight container at room temperature. If you have leftover filling, keep it in a separate container in the refrigerator. This way, you can fill the cookies just before serving, ensuring they stay crisp and delicious!
Can I freeze Cannoli Cookies?
Yes, you can freeze Cannoli Cookies! To do this, bake the cookies and let them cool completely. Then, place them in a single layer in a freezer-safe container or bag. They can be frozen for up to three months. When you’re ready to enjoy them, simply thaw at room temperature and fill with the ricotta mixture before serving.
What can I substitute for ricotta in Cannoli Cookies?
If you need a substitute for ricotta cheese, there are several options. You can use mascarpone cheese for a richer flavor. Alternatively, cottage cheese blended until smooth can work as a lower-fat option. For a dairy-free choice, try using a nut-based ricotta made from cashews or almonds. Just ensure that any substitute you choose has a similar creamy texture to maintain the delightful filling experience!
Conclusion on Cannoli Cookies – A Fun Twist on the Classic Italian Dessert!
In conclusion, Cannoli Cookies offer a delightful and innovative way to enjoy the classic Italian dessert. With their crispy exterior and creamy ricotta filling, these cookies capture the essence of traditional cannoli while providing a simpler, more accessible treat. Whether you’re baking for a special occasion or just indulging in a sweet snack, these cookies are sure to impress your family and friends.
By following the easy steps outlined in this article, you can create your own batch of Cannoli Cookies that are not only delicious but also customizable to suit your taste. From flavor variations to dietary modifications, the possibilities are endless. Plus, with helpful tips and serving suggestions, you can elevate your cookie experience to new heights.
So, gather your ingredients, roll up your sleeves, and get ready to bake! These Cannoli Cookies are a fun twist on a beloved classic that everyone will love. Enjoy the process, share with loved ones, and savor every bite of these delightful treats. Happy baking!
Relevant Recipes Link: